
How a Simple DIY Fix Saved My Weekend (And My Budget
There’s nothing quite like the satisfaction of fixing something yourself. Last weekend, I faced a plumbing issue that I couldn’t ignore. My kitchen sink leaked,
As a homeowner, taking on small repairs around the house can seem intimidating, especially if you’ve never done them before. However, with the right mindset, a little of practice, and a handful of useful tools, anyone can become a DIY pro. With confidence and ease, you can fix a door handle, unclog a drain, or replace a light bulb. In this beginner’s guide, we’ll show you how to tackle those everyday home repairs and handle them like a pro—all while saving money and feeling empowered.
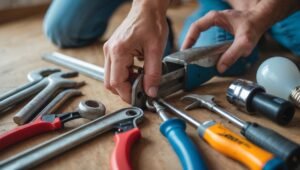
1. Start with the Right Tools
One of the most important aspects of successful DIY home repairs is having the right tools for the job. While it’s tempting to use whatever is lying around, investing in a basic tool kit will make repairs easier, safer, and more efficient. Here’s a list of essential tools every homeowner should have in their toolkit:
Hammer: A basic tool for hanging pictures, assembling furniture, or fixing loose nails.
Screwdriver Set: Includes both flathead and Phillips screwdrivers, which are essential for tightening screws or replacing hardware.
Pliers: Great for gripping, twisting, or cutting wires and other materials.
Utility Knife: Perfect for cutting drywall, trim, and other materials.
Measuring Tape: For measuring areas for repairs or installations.
You don’t need to have a massive collection of tools—just a few key essentials to help you get started. As you tackle more projects, you’ll naturally build out your toolkit.
2. Break It Down into Manageable Steps
When you first doing repairs around the house, it’s easy to get overwhelmed by the task at hand. The key to confidence is breaking the project into manageable steps. For example, if you need to fix a leaky faucet, follow these simple steps:
Turn off the water supply: Before you start, make sure you turn off the water to avoid a messy flood.
Disassemble the faucet: Use your pliers to remove the faucet handle and valve assembly.
Replace any worn-out washers or seals: This causes leaks.
Reassemble the faucet: Put everything back together and turn the water on to test for leaks.
By taking it one step at a time, you’ll feel more in control and less intimidated by the project.
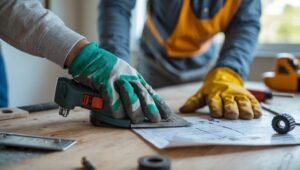
3. Learn the Basics of Safety
Safety should always be your top priority when tackling DIY repairs. Here are a few tips to keep in mind:
Turn off utilities: Always make sure the water, gas, or electricity is turned off before performing repairs that involve these elements.
Use protective gear: Wear gloves and safety goggles, especially for jobs involving sharp objects or chemicals.
Read the instructions: Whether you’re using a new tool or fixing something you’ve never worked on before, always read the manual or instructions first.
Taking these basic precautions will ensure that you stay safe and confident while working on your home repairs.
4. Start Small and Build Your Confidence
If you’re new to DIY repairs, it’s best to start with smaller, more manageable tasks. The idea is to build your confidence with simple fixes before tackling more complicated projects. Here are some beginner-friendly repairs you can try:
Replacing a broken lightbulb: An easy fix that only requires a new bulb and a stepladder.
Unclogging a drain: Using a plunger or a simple homemade solution like baking soda and vinegar can help clear most clogs.
Fixing a squeaky door: Apply a lubricant to the hinges to stop that annoying squeak.
As you gain experience, you’ll become more comfortable taking on more complex tasks. Don’t be afraid to challenge yourself as you progress!
5. Utilize Step-by-Step Guides and Online Resources
You don’t have to be an expert to handle DIY repairs. There are plenty of online resources that provide detailed step-by-step instructions for almost any task. Websites like FixItSmartly.com offer easy-to-follow guides for everything from home maintenance to car repairs. By following along with these tutorials, you’ll feel more confident as you learn new skills.
Check out our DIY Home Repair Mastery guide, where we walk you through essential repairs, from plumbing to electrical fixes, with simple instructions and helpful tips.
6. Don’t Be Afraid to Ask for Help
Even the most seasoned DIYers run into problems from time to time. If you’re stuck or unsure about a repair, ask for help. Whether it’s a friend, family member, or even a professional, getting the right advice can make all the difference.
Many communities have local DIY groups or online forums where you can ask questions and get tips from people with more experience. Embrace the learning process, and don’t be afraid to seek guidance when needed.

7. Celebrate Your Successes
Every time you complete a repair on your own, take a moment to celebrate your success. Not only have you saved money, but you’ve also gained valuable skills that will serve you well in the future. Whether it’s fixing a leaky faucet or successfully installing a new light fixture, take pride in your work.
As you gain more experience, you’ll see your home repairs as opportunities for personal growth and accomplishment. With each repair, you’ll become more confident in your abilities and more equipped to handle whatever comes your way.
FinalConclusion:
DIY home repairs don’t have to be intimidating. With the right tools, a clear step-by-step approach, and a little of patience, you can tackle small repairs around the house with confidence. By starting with simple tasks and gradually taking on more complex projects, you’ll not only save money but also gain valuable skills that will last a lifetime.
If you’re ready to dive into DIY home repairs, check out our DIY Home Repair Mastery guide for expert tips and easy-to-follow instructions on a variety of common household fixes.
Relevant Links:
DIY Home Repair Mastery guide for step-by-step repair instructions.
Fix It Before It Breaks: A DIY Prevention and Repair Handbook to help prevent major repairs in the future.
There’s nothing quite like the satisfaction of fixing something yourself. Last weekend, I faced a plumbing issue that I couldn’t ignore. My kitchen sink leaked,

Owning a car comes with its own set of responsibilities. Regular maintenance can prevent costly repairs down the line, and knowing how to handle minor

Homeownership comes with its fair share of maintenance and repair tasks. While some repairs are best left to professionals, there are plenty of simple fixes

As a homeowner, taking on small repairs around the house can seem intimidating, especially if you’ve never done them before. However, with the right mindset,

As a homeowner, it’s important to have a basic understanding of home repairs. Whether you want to save money on costly service calls or simply

Homeownership comes with a lot of responsibilities—chief among them, maintaining and repairing your property. While calling in a professional may seem like the easiest solution
